The Benefits of the Ditch Quilting Foot

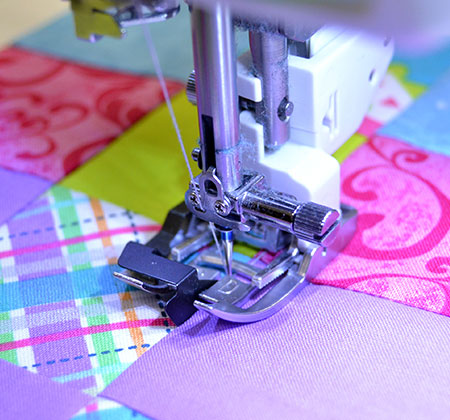
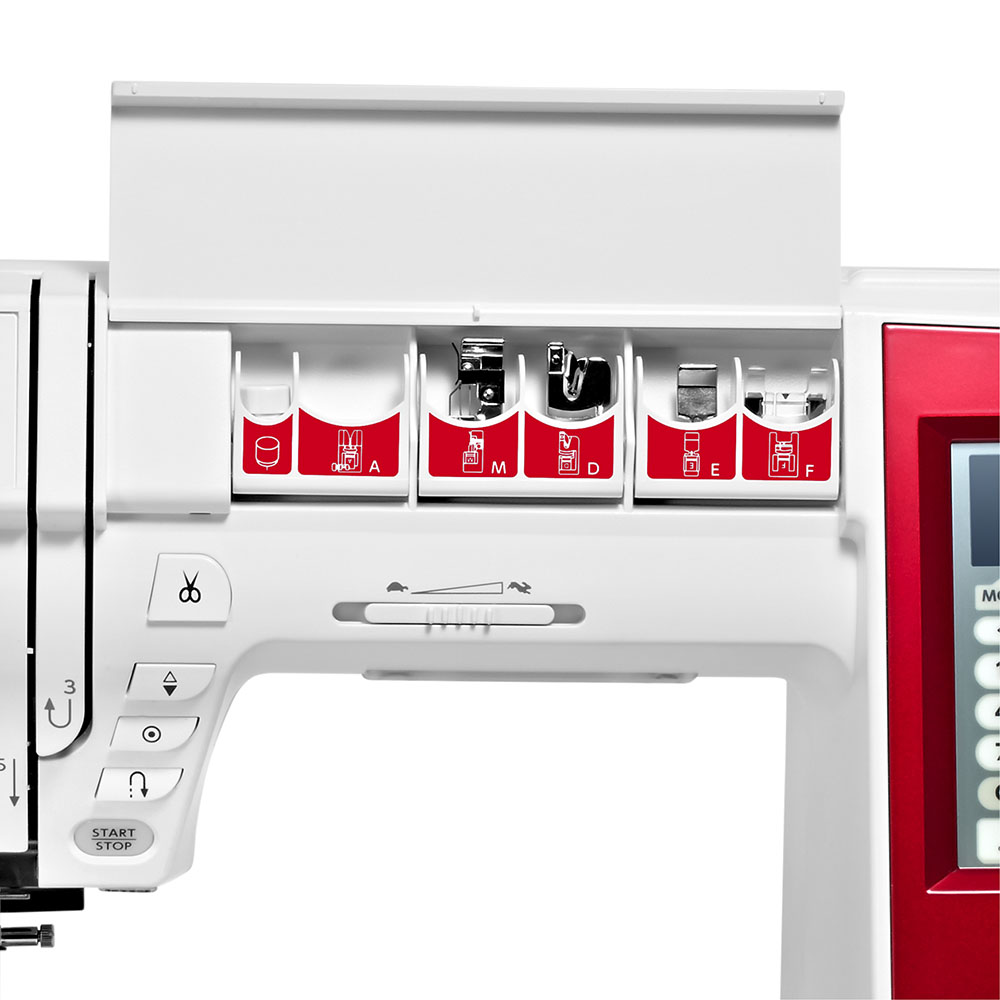
The ditch quilting foot in this pic is the metal foot S. This foot is available for 7mm wide and 9mm wide models.

We also have a wide range of other ditch quilting feet available for Elna sewers and quilters:

IMG_0581

There is a Ditch quilting foot especially for Acufeed model machines.

machine binding tutorial7
acufeed-ditch-quilting
  • The Clearview foot and guide set which has a 1/4 inch guide as well as a Ditch quilting guide for the center position. The advantage of this foot is that it is clear so you can see through the foot for extra vision. 
acufeed flex dQ

Here are a dozen ways to use these feet:

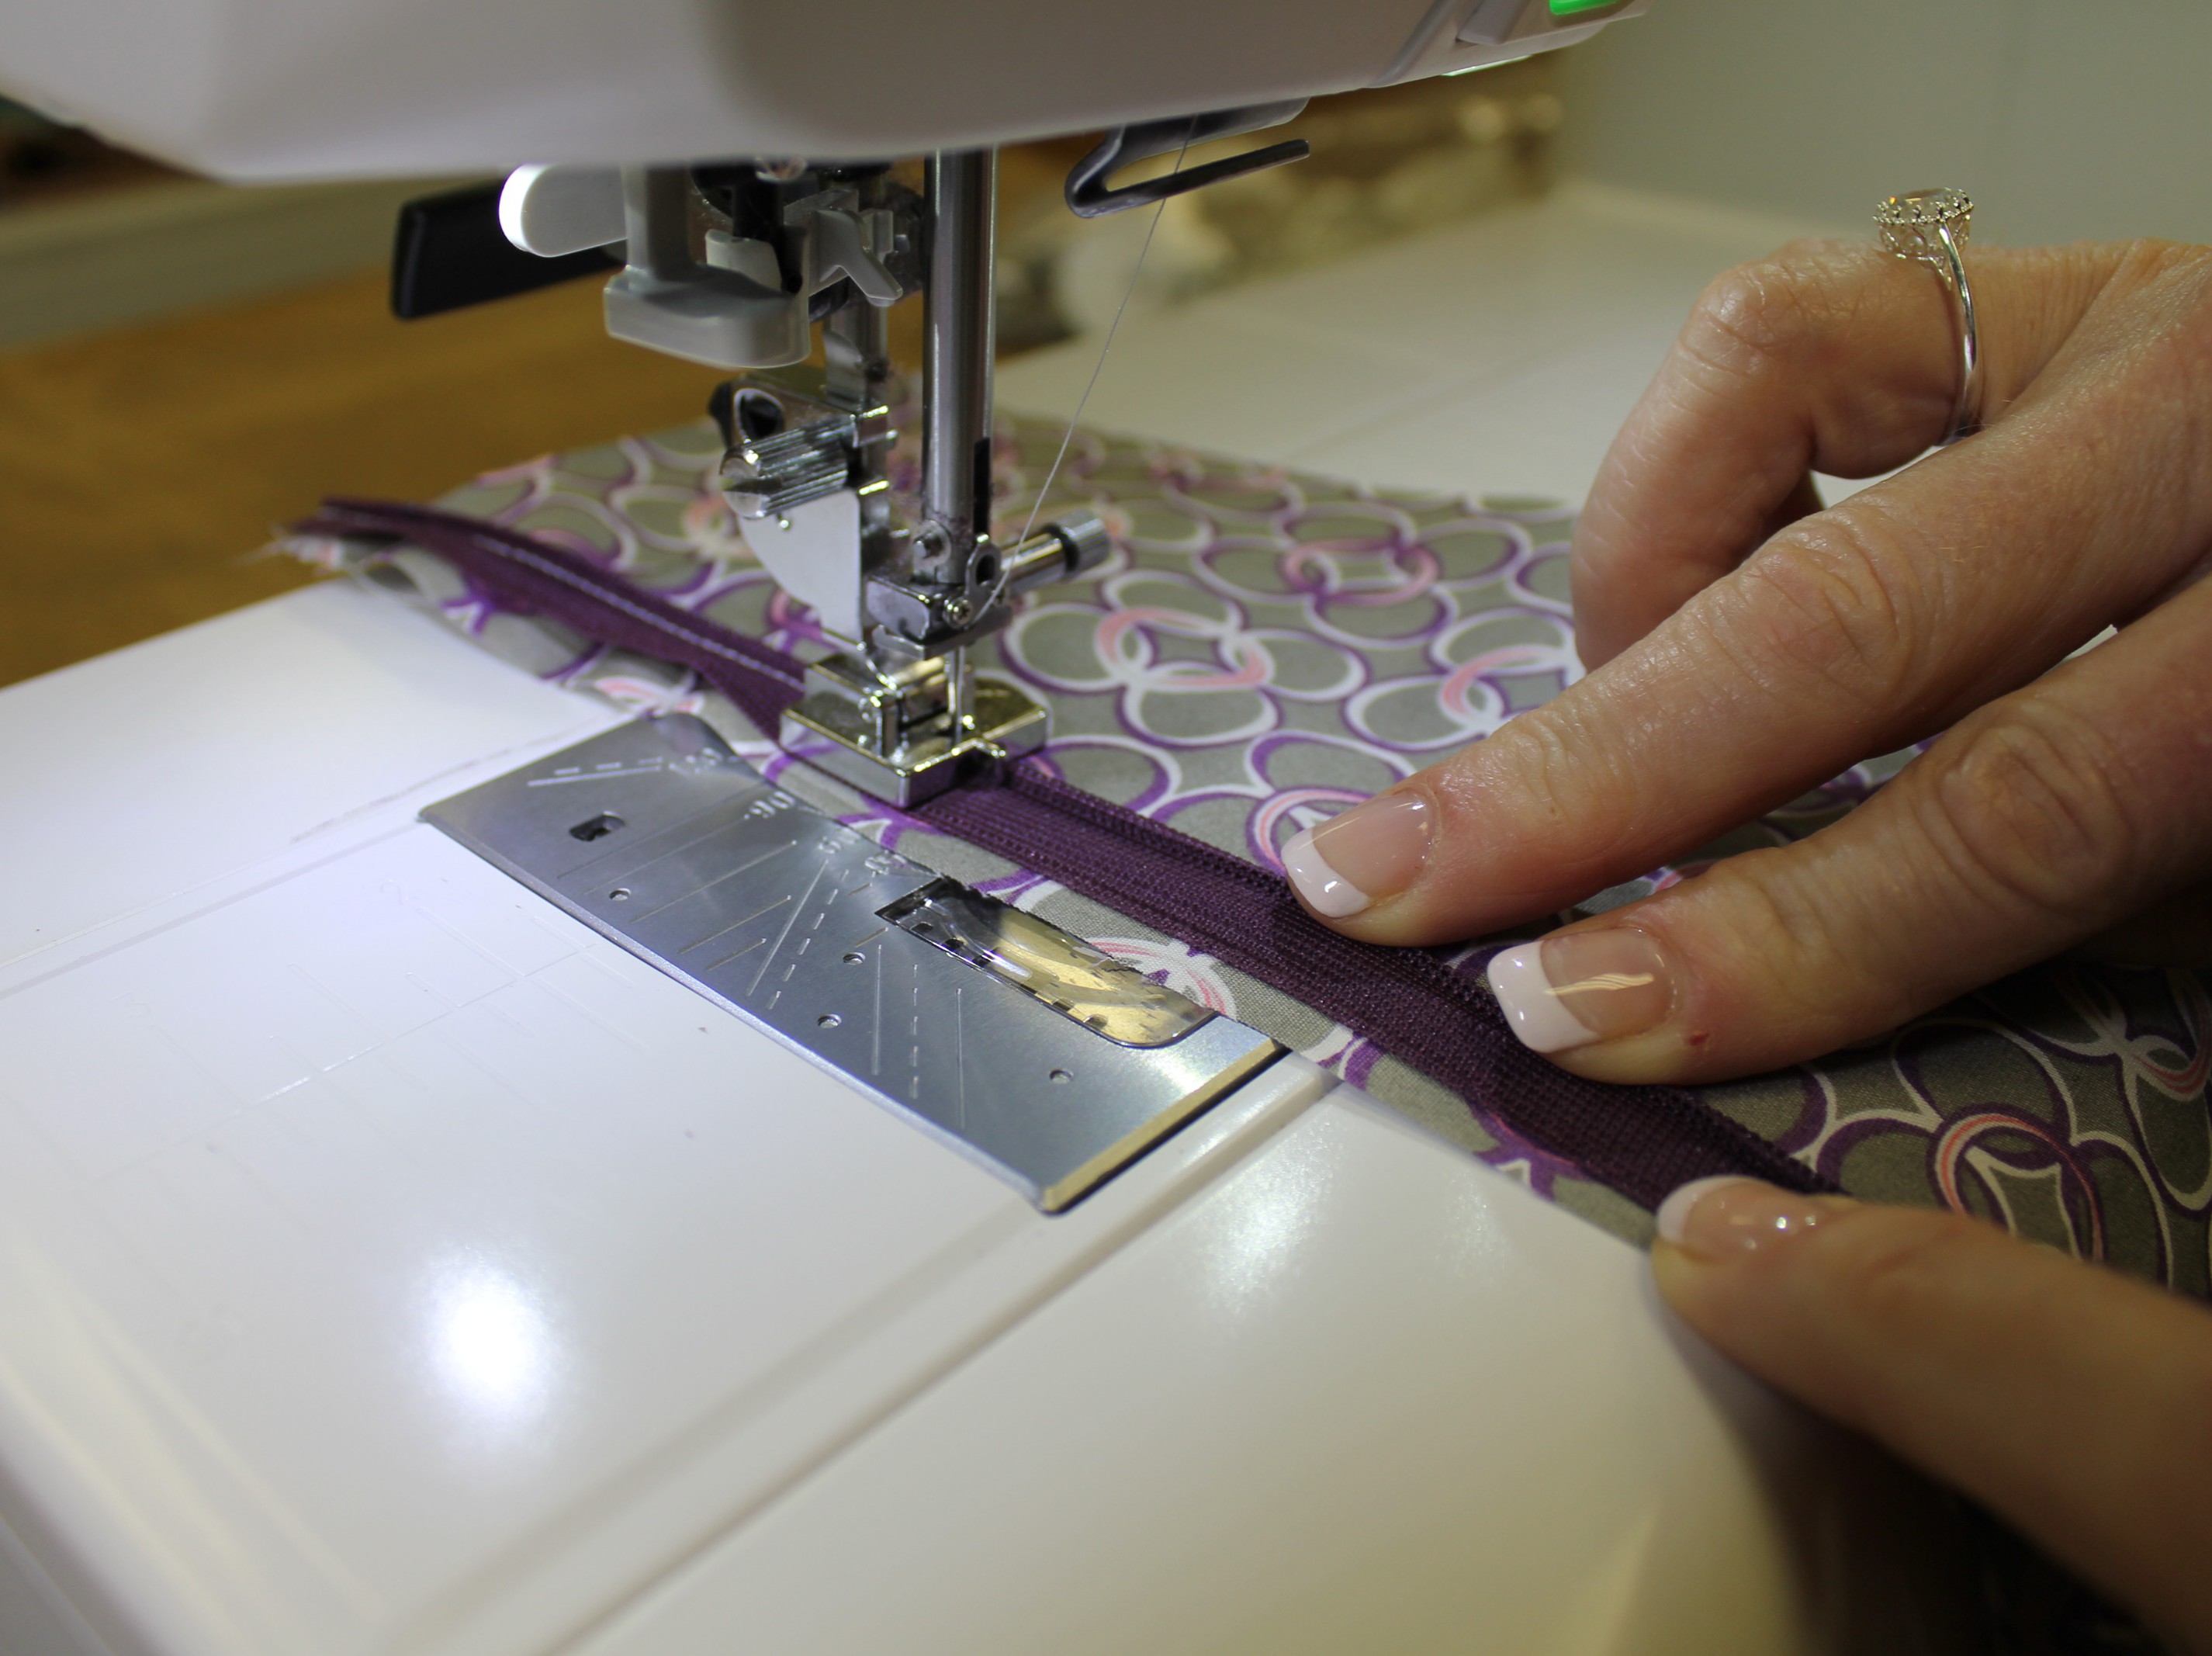
  1. Use as a guide foot for Top stitching on garments, home dec projects and quilting. Move the needle position to where you desire the stitching to be and ride the center guide down the ditch of the seam for perfect top stitching placement.Ditch quilting foot was used to precisely top stitch this princess line seam on a pair of dress pants
  2. Use for heirloom sewing for lace insertions: Sew with the guide along the edge of the lace header and adjust the needle position so it catches only the very edge of the lace as required.
  3. Use it to sew lace edgings to collars, pockets, sleeves, etc. Butt lace up against finished edge with guide between fabric & lace, sew for a perfect “catch”.
  4. Use to sew lace insertions together for fine heirloom lace work: butt lace sections together, adjust stitch width to catch just the edges & away you go.
  5. Use for stitching-in-the-ditch when doing machine quilting or other projects that require this type of stitching. Adjust the needle position as required.
  6. Use as a guide when doing outline and echo quilting if the space between is small. (Use the quilting arm/guide if the space is larger). Adjust needle position as required.
  7. Use when stitching binding on quilts and home dec projects. Use for attaching the binding to the quilt if you want a very narrow binding. OR sew with the guide along the edge of the binding turn-over, adjust needle position to catch the edge & away you go. No more tedious hand stitching and pricked fingers! Attach binding to the BACK of the quilt & flip binding over to the front. Sew down and if your bobbin thread matches, you will barely see the machine stitching on the back of the quilt.

8. You may use also this foot for regular machine applique. However, I do prefer the Open Toe applique foot as it allows me to see more of what I am sewing.

dq8
dq7
dq6

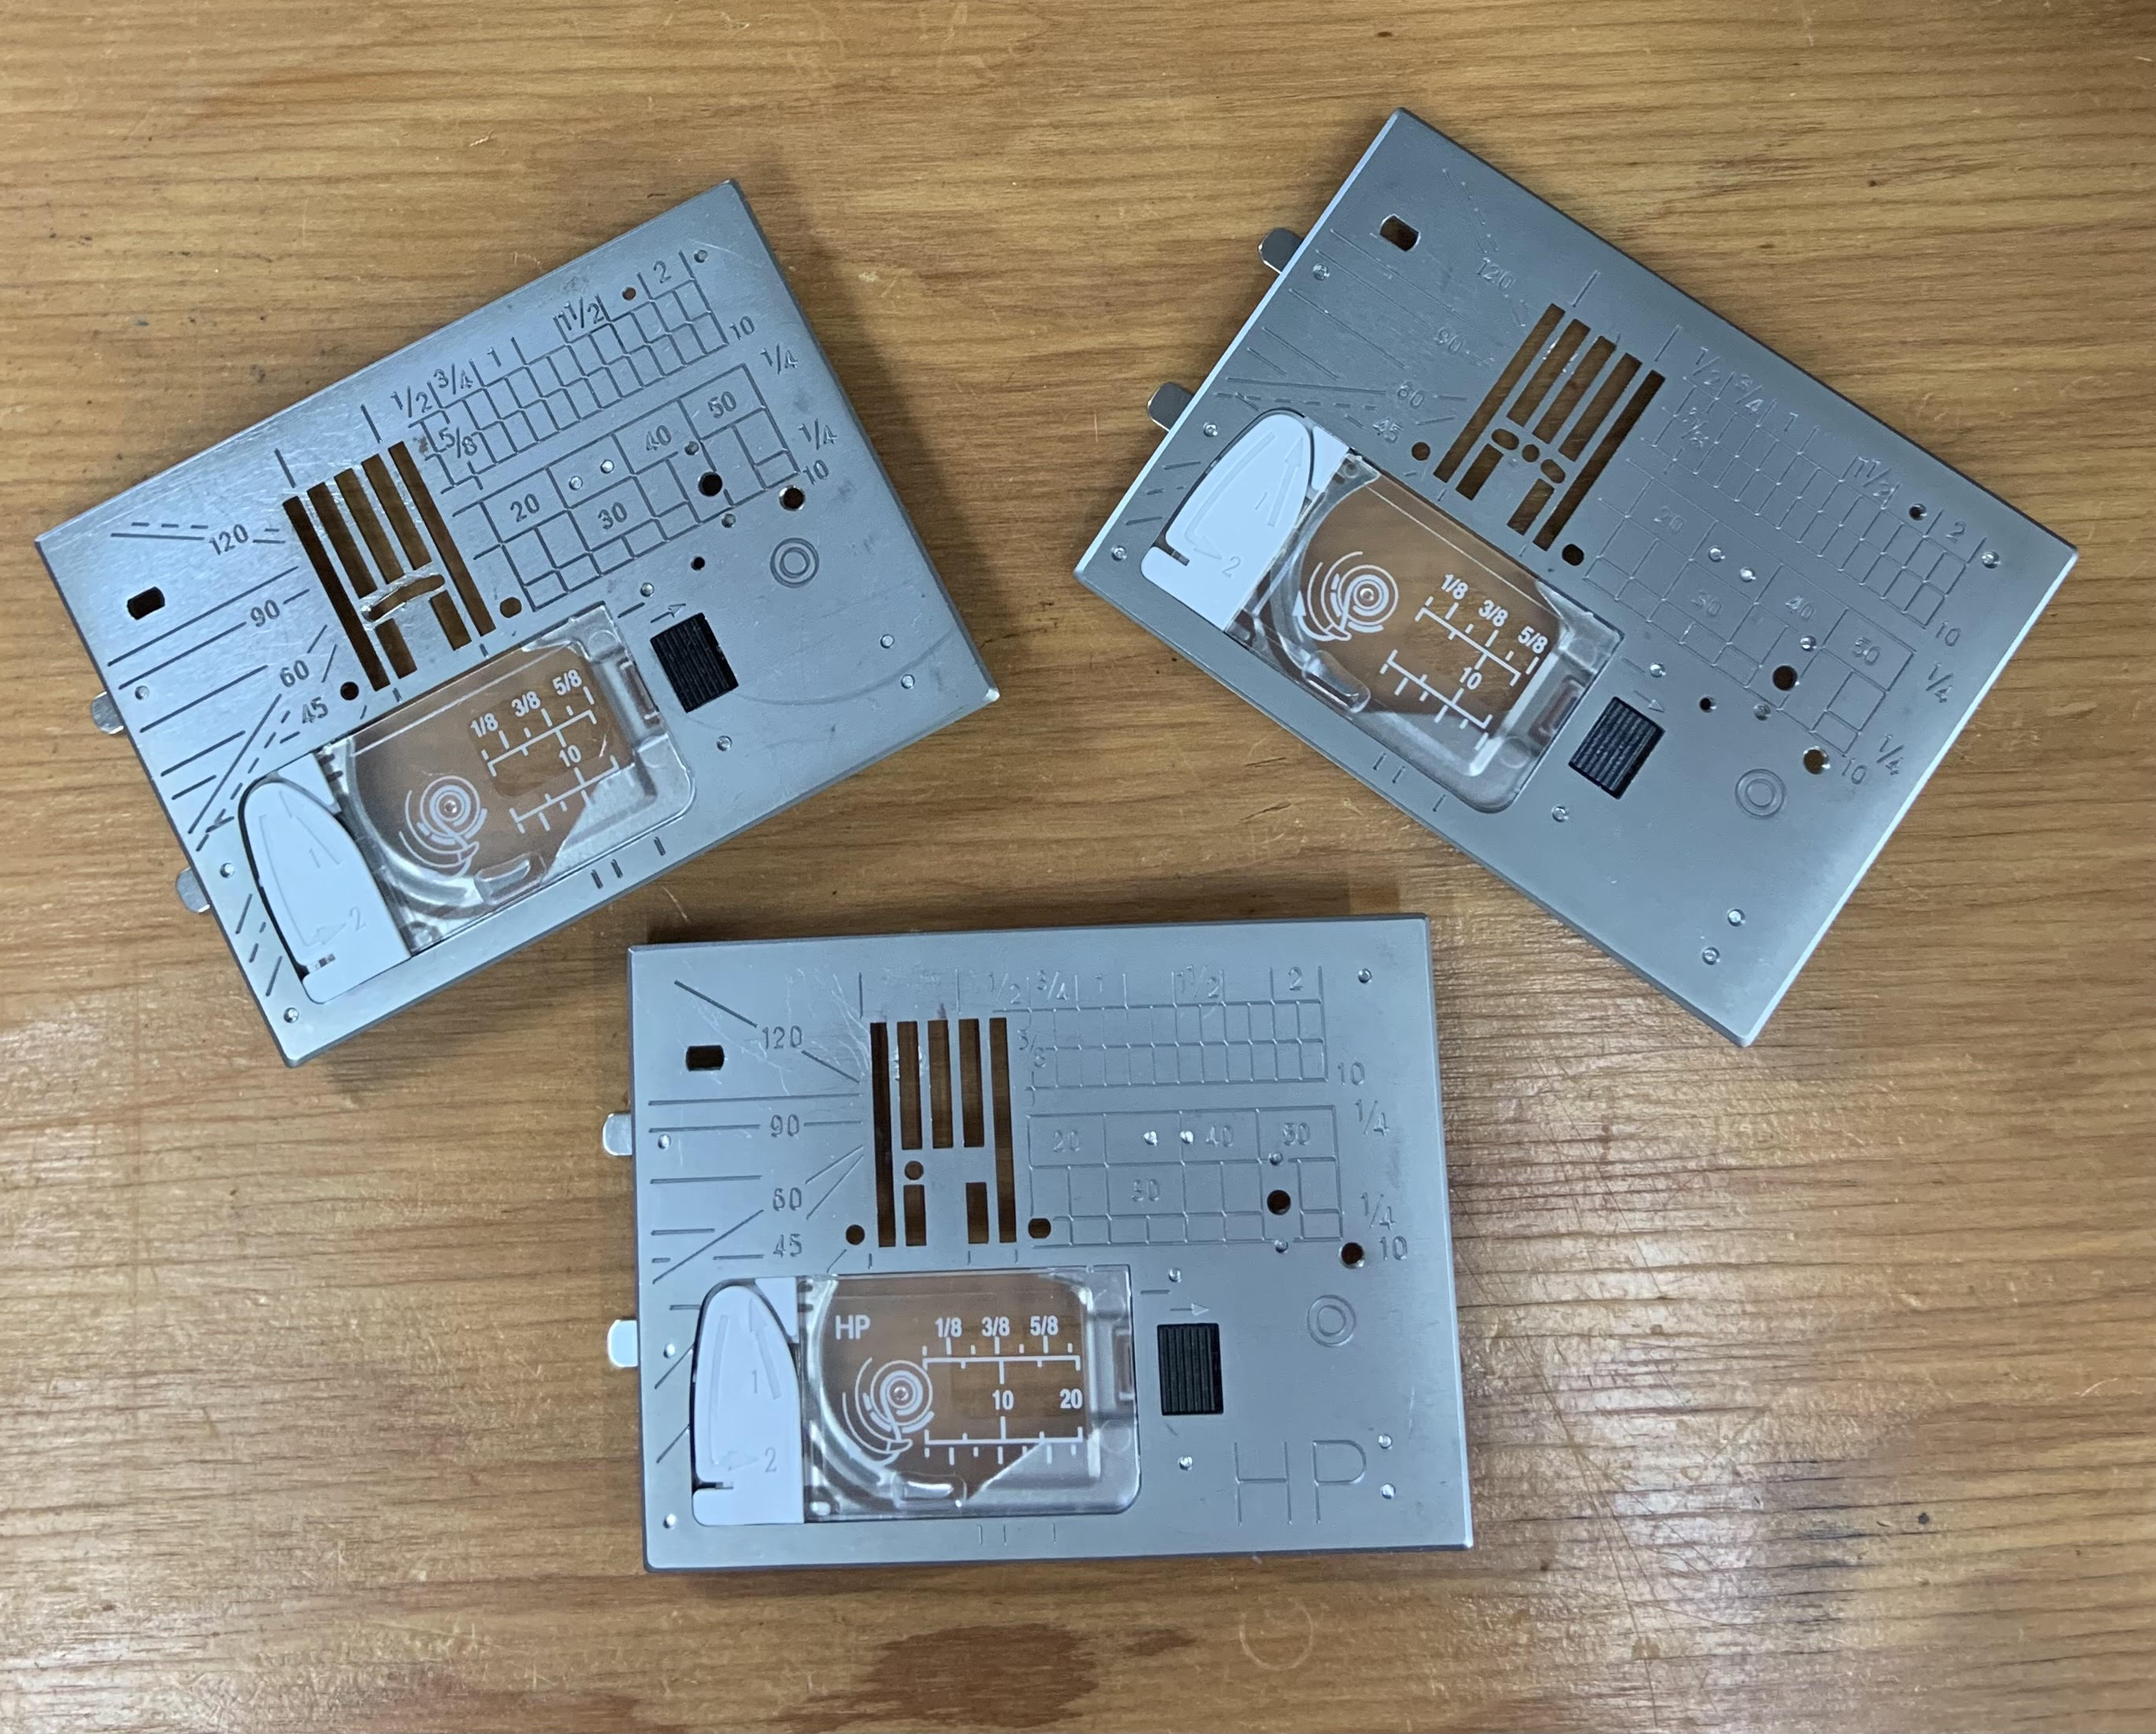
9. Works very well when doing faggoting or bridging. Butt 2 pieces of fabric alongside each other with the Ditch quilting foot guide between the 2 pieces, choose a bridging stitch & away you go. You may also use the bridging guide which clips into the needle plate to help you with maintaining a space between the fabric pieces

dq5

10. Use it to sew “Granny Squares” together (quilt-as-you-go blocks that are already finished along the edges) as it assists in this similar bridging stitch function.

11. Great for applique projects such as Madeira applique which requires accurate edge sewing to catch the fabric along possibly fiddly curves & points. This foot helps as it “rides” along the fabric edge.

12. When doing multiple rows of dec stitching, you may want to use this foot as a guide to place subsequent rows of stitching very close together. If you use the edge of the foot, it may be too far away. Alternatively you may prefer to use the Border Guide foot.

What project will you be stitching with your Ditch Quilting Foot Today?

Happy Sewing!

Originally posted on Janome Life

Posted in Uncategorized | Tagged , , , , | Leave a comment

The Elna eXcellence 680

What a beautiful computerized machine, it’s the perfect size with all the functions I need to make gorgeous works of art.

Large easy to read screen

The Elna eXcellence 680 is the perfect companion for retreats (once we are allowed to meet again). It has all the features and accessories I love. The ease of choosing the stitches is at your fingertips, such as going from straight stitch to 1/4″ stitching is awesome. The large screen is convenient and easy to read.

This little extra exclusive accessory storage design is genius. I love having my most used sewing feet easily accessible at my fingertips in the front cover. There is little chance of loosing track of the feet with these identified compartments.

Large working space table.

The table is large and clear, a brilliant idea to be able to see under the table to find those misplaced scissors that creep under the table. The added measuring ruler stamped on the table helps out with quick measurements and always accessible. Of course the table height is adjustable to help keep everything level.

The Elna eXcellence 680 also has the one step needle plate conversion that I love. The three plates included are so easy to change with just one click. No need to play with a little screw driver and then loose the tiny screw. I absolutely love this feature. Of course this means there are numerous functions to choose from to tackle all your needs.

With the 170 stitches to choose from and the 9mm stitch width it is hard to choose just one design to use in your creations. You can even create your own labels with the alphabet included.

The product quality and user comfort of this sewing machine makes it an easy choice to make when looking for a sewing machine.

There are so many features on this machine that I love, I will have to write an other post.

Contact your local dealer for more information.

Keep on Sewing

Monique

Posted in Uncategorized | Tagged , , , , , , , | Leave a comment

New! ELNA magnetic PinPal!

Keep your pins organized and easily accessible where you need them with the NEW ELNA magnetic PinPal from Grabbit, available from ELNA Canada dealers. And yes, for you Janome owners, there’s an Janome PinPal available from Janome and ELNA dealers, as well!

NEW ELNA magnetic PinPal by Grabbit – available from ELNA and Janome Canada Dealers.

Contoured to fit securely and comfortably in your hand, it’s easy to take the ELNA PinPal wherever you need it, though these are sew convenient, you’ll want more than one to keep at each machine, or for each type of pin or for other metal items like seam rippers, snips and screw drivers which easily get misplaced.

Never again will you loose track of your pins, scissors, snips, seam ripper or screw driver!

Powerful magnets inside the ELNA PinPal keep items securely in place, though it’s safe to use around your computerized sewing and embroidery machines.

At only 3 1/8″ x 4 1/4″ x 1 1/4″ tall, the ELNA PinPal doesn’t take up much room on your sewing table, and you won’t have to worry about accidentally knocking it over since the pins are safely and securely held in place! Hands up those of you who have spent time crawling around on the floor on your hands and knees looking for all the stray pins, or worse, how many stray pins did you find by stepping on them?!? Well, say good-bye to those painful days! lol!

The part number for the NEW ELNA PinPal by Grabbit is PP-ELNA. The part number for the Janome PinPal is PP-Janome. Your Janome and ELNA Dealers have all the info, and best of all, these are IN STOCK in our Janome/ELNA Canada warehouse, so you can order yours today!

Happy Sewing!

Posted in ELNA SEWING MACHINE, Sewing Accessories, SEWING NOTIONS, Uncategorized | Tagged , , , , , , , , , | Leave a comment

I’m Going to be a Nana!

I am very excited to announce that I am going to be a Nana in December! We then found out my daughter’s sister-in-law is having identical twin boys in November. Then my Grand daughter informed me that I was going to be a Great-Nana. We are having four babies in as many months.

It is going to be a busy time!

eXpressive 920 Sewing/Embroidery Machine.

One of the machines I have been using to create baby gifts is the eXpressive 920 Embroidery Machine. I love doing in the hoop (ITH) projects and this is a great machine to do them on.

There are many embroidery sites to get ITH designs from, but I really like Sweet Pea Embroidery Designs. https://swpea.com/ They have a huge selection of in the hoop projects. I can spend hours scrolling and drooling about designs that I want to do.

I chose the elephant and balloons bib pattern to try. There are great instructions with loads of pictures.

Once all four blocks are completed, I sewed them together and picked a backing fabric. I pinned in place and sewed all around leaving the bottom open to flip right side out.

When all the corners are pushed out, I top stitched all the way around.

Don’t forget that you don’t have to follow the colour choices given in the pattern. You can custom make your own projects to create your own unique gifts.

Thank you to Sweet Pea Embroidery Designs for creating such amazing designs and letting me use them.

Happy Sewing!

Posted in ELNA eXpressive 920, Uncategorized | Tagged , , , , , , , , , , , , | Leave a comment

The Elna eXcellence 780+

What do I love about this machine? There are so many functions and applications with Elna Excellence 780+ that I use often that I will have to write more than one post.

The Elna eXcellence 780+ is a premium computerized sewing machine. One of many features I love is the Sewing Applications Menu (the T-shirt Icon). The Sewing Applications is a unique feature that facilitates twelve common sewing techniques. By selecting the desired function like “Quilting” the machine automatically adjusts the appropriate stitch length and guides you through the steps and choices of the presser foot and needle plate you require. The machine takes all the guess work out of choosing the right settings.

Check out the large LCD screen with ease of access to all the functions.

Another reason I love this Ultimate Quilting Machine is the large work space. The throat space is ideal for free-motion quilting and has great LED lighting. The extra-wide extension table is included too. Bonus! The eXcellence 780+ comes with four special presser feet for free-motion quilting, including the clear spoon foot which is perfect for applique quilting applique.

I can’t neglect to mention what really attracts me to this machine is the ease of removing and inserting the needle plates. No screws and fiddling around trying to change the plates. The three plates included are just a click away from changing.

The dedicated functions and accessories of the Elna eXcelence 780+ make it the dream machine for patchwork & quilting enthusiasts. What is even better is the price point. Contact your local Elna Dealer for more information.

Keep on Sewing.

Monique

Posted in Elna eXcellence 780 | Tagged , , , , , , , , | Leave a comment

Christmas in July…… Get a Head Start on Your Christmas Sewing!

Picture courtesy of mysewingroom.ca.

I DO try, honest I do, but some years the wheels fall off for one or another reason so that despite my best intentions, December rolls around and I am nowhere near to finishing my Christmas sewing projects.

Why, in the first place, do I have Christmas sewing each year?? Well, that is easy to answer: because I am so passionate about sewing that I would rather make special one-of-a-kind gifts for family & friends rather than rack up $100’s or $1000’s on items bought at the malls.

christmas

Delightful Christmas Tree ornaments made by customers at one of our dealer’s stores for Christmas. These were created in the hoop on our Elna Excellence 830L Embroidery machine and then used to cover an ordinary Christmas ball to hang on the tree.

CHRISTMAS CARDS??    Now I no longer send out Christmas cards. I figure we live in an age of emails & online newsletters, etc, so to send out Christmas cards which end up in the recycling bin by January, is in my opinion a little absurd. I would far rather make a small personalized gift for some of the folk I would have sent a Christmas card to. Besides which, have you seen lately what it will cost to mail out Christmas cards? Each year I pick a small project or 2 and I start earlier in the year making these so that everyone has a little something from me. Some years I made a Christmas tree ornament in the embroidery hoop of my ELNA embroidery machine. Other years I sew luggage tag, little in-the-hoop zipper baggies or key fob on my ELNA sewing machine.

See pics below for additional ideas for Christmas gift sewing and home decorating for the holiday period.

What am I doing this year? Well, truth be told, I have not decided yet but I will make that high on my to do list or I may not be done by Christmas!

Picture courtesy of veryberryhandmade.co.uk.
Picture courtesy of aestheticnest.com.
I used scraps of fabric decorated with machine decorative stitches and ric-rac, lace etc.
What about a cover for your Elna sewing machine to celebrate the holiday season?
Picture courtesy of plumgoodquilting.com.
pic courtesy of all freesewing.com
Picture courtesy of all freesewing.com.

But it is not only about sewing Christmas gifts in lieu of Christmas cards…….there is also the sewing of PJ’s for the little ones, making Advent calendars (which I did one year but need to restock them with little candies & gifts again this year); as well as Christmas decorations and home decor projects for the holiday season.

Picture courtesy of mycottoncreations.com.
Picture courtesy of s embroidery.com.
Christmas wouldn’t be Christmas without the yummy food ……and an apron appropriate for the season!
Picture courtesy of allfreesewing.com.
I thought these were simply the cutest little shoes! Picture courtesy of craftsy.com
What a great way to use up your stash of Christmas fabrics: napkins for use at your Christmas meal or as gifts.
Picture courtesy of littlebluebell.com
Personalized pillow cases always make special gifts – AND they are so easy to make
Picture courtesy of hobbyfarms.com.

I think you get the idea……we GOTTA START NOW! I hope the pictures above inspired you to get sewing to make this a memorable Christmas of lovely home sewed gifts and décor made on your Elna sewing machines. It is so nice to receive a homemade gift rather than impersonal one bought in a crowded mall (assuming we can actually walk around safely in a mall come the end of this year. I’m making no predications as none of us thought it would last this long………

Originally posted on Janome Life by Liz Thompson.

Posted in Uncategorized | Tagged , , , , , , , , | Leave a comment

Rope Bowls

Today I bring you a quick and easy decor project! Rope bowls! These seriously have endless uses around the house. These are so fun to make that you won’t be able to stop making them! The materials are very affordable and easily customizable. I swear I’m not lying about the easy part either. The hardest part is at the beginning and end and I’m going to give you some tips and options to make those parts easier.

Materials:

See the source image

The Elna Excellence 780+ is a fantastic machine to make rope bowls. Sews like it is sewing through butter.

  • Macramé cording in your choice of size and colour (larger diameter cord will be a softer more flexible bowl, smaller diameter will be more rigid)
  • Thread (I used Madeira Polyneon in Neons!)
  • Janome Sewing machine with zig zag capabilities 

Setting up your machine. 

You are going to want to play around a bit with some scraps of cording. You want to pick a zig zag stitch that you like the look of and that will catch the two cords, covering enough area where everything is secure.

Up first you need decide what shape you want your bowl to be. If you are looking for a round bowl you are going to start with a spiral and if your are looking to make a long bowl you will start with an oblong design (side note, oblong is a great word!)

This part is very important: No matter what shape you are making you want all the cord to be added to the right hand side of your bowl. This is way ahead of the game but the picture below shows how we will be making the sides go up. If you are adding cord to the left side of your project you will not be able to turn your sides because your bowl with be in the throat of your machine. 

Tips for starting with a spiral

This is a little tricky but hang in there, it is worth it. The issue with starting with a spiral is that it doesn’t all touch the feed dogs so it has trouble feeding at first. So my solution to this is, don’t start at the beginning. What am I talking about? Hang in there.

Make your beginning spiral and then keep adding rope and not stitching until it is big enough that it will reach more of the feed dogs. Then start stitching there and add a few rounds. This is going to hold everything in place. Now you can go back and finish all the way to the centre without a struggle. Then go back and keep adding more rounds. 

Tips for starting with an Oblong

This method is a bit easier than the spiral. Determine the starting length. You may have to play around with your cord a bit to figure out exact dimensions if you are looking for a particular finished size. Your starting length is going to be shorter than your finished length because you will be adding rounds to it. Once you have selected your starting length, fold your cord in half with the end on the left. You are going to start stitching at the fold, NOT at the end.

Next steps:

Keep adding cord to your base (try not to get dizzy) until they are the right size. Once you have the base at the right size you are going to move on to the sides. To do this, leave the needle in your project and pick up the base and tilt it upwards. How sharp of an angle that you lift it will determine the steepness of the sides of your bowl. For gradual side, just lift your project a few inches. For a sharp side lift your project completely vertical. Then keep sewing. It’s as easy as that!

Finishing the bowl:

To finish the bowl there are endless options but here are my favourite.

  1. Tie a knot in your cord and continue sewing until you are as close to the knot as possible, backstitch to secure and trim the cord to the knot.
  2. Cut your cord approx. 1.5” past where you want the bowl to end. Fold the end underneath and then stitch down. You will have to stitch it down in 2 sections as seen below.

Originally posted on Janome Life by AmandaBee.

Posted in Elna eXcellence 780 | Tagged , , , , , , , , , | Leave a comment

Sunday Sewing with Elna: Do you create Quilt Labels for your quilts?

Quilt labels are super easy to make with your embroidery machine! You can add multiple rows of text to a single embroidery design with all Janome embroidery machines! 

To make the quilt label, we oriented our text vertically in order to maximize our hoop space. 

We used 3 different pre-programmed font styles, in combinations of small and medium sized text. 

We also added built-in embroidery designs and stitched a border onto our quilt label using a decorative stitch from one of the built-in stitches on the ELNA eXpressive 830L. 


Your quilt will live a long life and having a label gives the history of the quilt. Who it was made for, why it was made, who created it and the date.

See the source image
Picture courtesy of Quilting Queen Online.
See the source image
Picture courtesy of Big B Quilt Labels.

Happy Sewing!

Originally Posted by Linda P.

Posted in EMBROIDERY PROJECTS WITH ELNA | Tagged , , , , , , | Leave a comment

Sunday Sewing with Elna: Concealed Zipper Foot

Zippers can be like free motion quilting….they seem to strike fear into us! But like everything else……when you know how and have mastered the skill, you will wonder what was so scary about the thought of inserting an invisible zipper.

IMG_1392[1]

Invisible or concealed zippers are just that…..you can barely see where they are in a garment so they truly do conceal closures in skirts, dresses etc.

I made this skirt in a linen fabric with an ethnic/African print. I also made  a lovely mustard coloured knit top to wear with it. I obviously wanted the zipper to blend in and not be seen.  See below.

The CONCEALED OR INVISIBLE ZIPPER FOOT Z makes the task of inserting the zipper SO much easier.

Tip#1: carefully press the coils on the invisible zipper open a little to make the sewing close to the coils much easier. Take care as the zipper is nylon and could melt if the iron is too hot. You need to be careful you don’t burn your fingers either! Those silicone finger sheaths are a big help.

The concealed zipper foot has 2 grooves underneath. The coil is held open by the foot to make the sewing easy.

concealed-zipper-foot-Z-859815002

Here is a video of how to use the concealed zipper foot.

There are 3 different Concealed zipper feet: Z for 9mm machine models, Z for 7mm machine models and one for front loading Elna models. Contact your local dealer for the correct one based on the model of sewing machine you own.  

The first side of the zipper is attached, right side down, wrong side up.
The concealed zipper foot in action sewing the second side of the zipper.
The seam below the zipper is sewed closed AFTER the 2 sides of the zipper have been inserted. The side or center seams would need to be left open until then. It does help to hold the tails/ends of the zipper away from the seam allowance when you do this. It is also advisable to use a zipper at least 2-3 inches longer than the zipper opening as this makes the task much easier. The excess amount of zipper may be cut away afterwards or just left inside the lining of the skirt or dress.
A regular zipper foot is used for closing the rest of the seam so that the needle position can get as close to the previous stitching against the zipper coils so that the straight stitching is “seamless”.
This invisible zipper is on a patch pocket

Happy Sewing!

Originally posted on Janome Life by Liz Thompson.

Posted in ELNA SEWING ACCESSORY FEET | Tagged , , , , , | Leave a comment

Should you Resize an Embroidery Design?

That is the question! Can a 7″x7″ embroidery design, be reduced to a 2″x 3″ embroidery design for example?

For basic resizing in all Elna embroidery machines, designs can be reduced or increased by 20%. The machines don’t have an internal stitch processor to add or take away stitches. At 20% resizing, the integrity of the design is maintained; 20% larger won’t have any gaps and 20% smaller won’t be too dense.

The Elna eXuberance software lets you increase and decrease the size of your design so long as it fits into your hoop. The software has a very powerful stitch processor that can add and take away stitches. But there is the question of integrity. For example a design digitized 2″x 2″ is tiny and won’t have many details or colour changes. If you were to increase that same design to 7″x 7″, the stitch count would increase proportionately but it may look a little ‘flat’ because there isn’t enough detail. The software can increase the stitch count but not add that extra detail.

small car
This antique car’s original size is 2.4″ x 2″ and 6,719 stitches.
large car
This version has been increased to 8″ x 6.5″ and 32,932 stitches.

It looks okay but for the size of the design, but there is not enough detail. There should be lines on the tires, shading on the body to give it more dimension and maybe even more detail on the grill.

The opposite would true for a larger design and trying to make it smaller. Say, you want it for a patch on a child coat.  The design is digitized 7″x 7″ with a lot of detail. The software will remove stitches, but there will still be the same number of colour changes with the same amount of detail.

Wolf 7x7
This original design is 7″x 7″ with 77,291 stitches and 12 colour changes.
2.75 x 2.6 wolf
This design is only 2.75″ x 2.6″, 46,178 stitches and still has 12 colour changes!

Some of the colour changes will only be a couple of stitches, especially the shading of the wolf’s fur.

Maybe this design shouldn’t be resized!

The examples I’ve used are extreme, as it is totally possible to increase or decrease a design that are less detailed and get amazing results. This is just food for thought because the more you know the better you embroider!

A little trick , I have used many times with the resizing tool on my embroidery machine,  is to enable me to rotate a design in the hoop! Some designs can’t be rotated it ‘hits the wall’ of the screen while rotating. By decreasing the size of the design to 80%, most designs can then be easily rotated. Once the design is in place, resize back up to 100%. PS – some Elna Embroidery machines do allow you to rotate your designs without “hitting a wall”.

We thought this post would give good information for those of you who are taking advantage of the current Elna eXuberance software FREE trial offer.

Don’t forget that it is not too late to register for the free trial. Click here for more info. Registration closes on 15th May. And you have until end of this month to enjoy using the software. We also have Part 1, 2 and 3 online classes on the Elna eXuberance software being offered on 13th; 20th & 27th May. Please contact your Elna canada dealer or Click here for more info.

Happy Sewing!

Originally Posted on Janome Life.

Posted in Uncategorized | Tagged , , , , , , | Leave a comment